One day Mickey was on a drive in his car when he saw Minnie in the market. Mickey stopped and approached her
Mickey – Hey Minnie
Minnie – Err… Ah…Hi Mickey! What are you doing here?
Mickey – I was feeling lonely at home so thought of going on a long drive
Minnie – Great!
Mickey – By the way, What are you doing here?
Minnie – Nothing, just came to get some stuff
Mickey – You look lost. What’s the matter?
Minnie – Thinking about something
Mickey – Tel me
Minnie – You see I need to explain SSH in my next class and I have not got any time to prepare the topic
Mickey – Well! Don’t worry now, I am here
Minnie (Excited) – Wow! You know about SSH, Please tell me!
Mickey – Sure, why don’t you come along with me and we will go on a long drive and I will explain on the way
Minnie – Sure, Let’s Go!

Mickey – Okay Minnie, SSH = Secure Shell
Minnie – Okay, good to begin with
Mickey – In simple words, it is a network protocol, that provides a secure channel over a network for a client and server application to transfer data or information OR a secured way to access any resource over a network
Protocol = Some set rules and guidelines
Minnie – I have read that online, but need to understand in simple words
Mickey – SSH is a protocol that allows two machines to communicate securely over a network

Minnie – Yes, but how does it do that
Mickey – It secures the data or information exchanged by encrypting it
Minnie – What does that mean
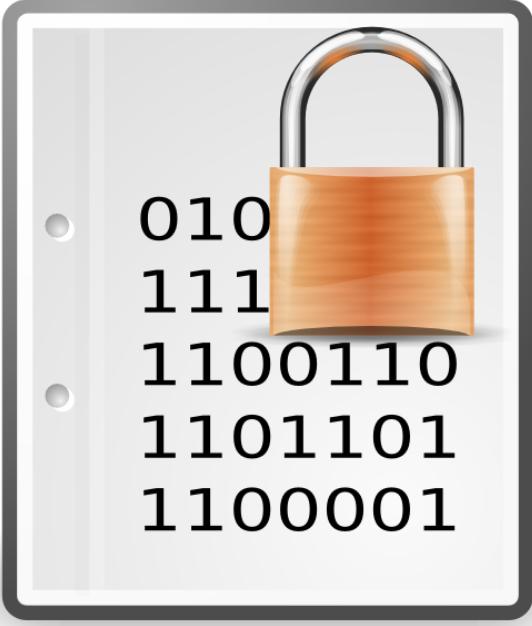
Mickey – Encryption is the process of encoding information. In simple words, it takes readable data and alters it so that it appears random and unreadable (called ciphertext)
Minnie – Oh so how do we get the original data
Mickey – Now you are asking the right questions
Encryption requires the use of an encryption key which is a set of mathematical values that both sender or recipients of the message know
Minnie – So is this like the key to the lock
Mickey – Exactly and it is called as the encryption key that is generated by some algorithms
Minnie – Mickey look, I am starting to get this, okay. But as always can you explain in simpler terms with an example
Mickey – Sure, here you go
Imagine, you need to send an important box to your friend and want to send it securely. You can put a lock on that box and send it over

Minnie – Okay, but the key is with me, How will my friend open the box
Mickey – Here comes the interesting part. When your friend receives the box he puts his own lock on the box and sends it back to you
Minnie – So the box now has 2 locks
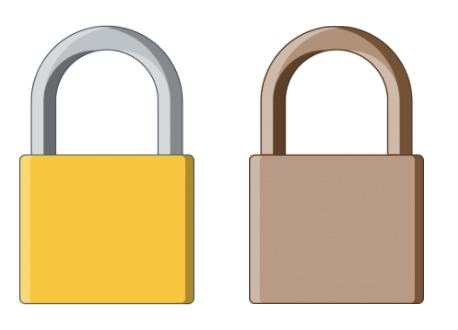
Mickey – Yes, and when you receive the box, you open and take off your lock. Now the box is left with your friend’s lock on it. And you send it to your friend again
Minnie – And when my friend receives the box, he can open as he has the key to his own lock
Mickey – Yes exactly. This is a secured way to transfer the box or data in the box
Minnie – Well that was interesting, It will be great to get more details on How SSH works
Mickey – Sure here you go
Minnie – Yeah! The fun starts
Mickey – I will need to go a little bit in history to explain
Minnie – Sure, do as you will
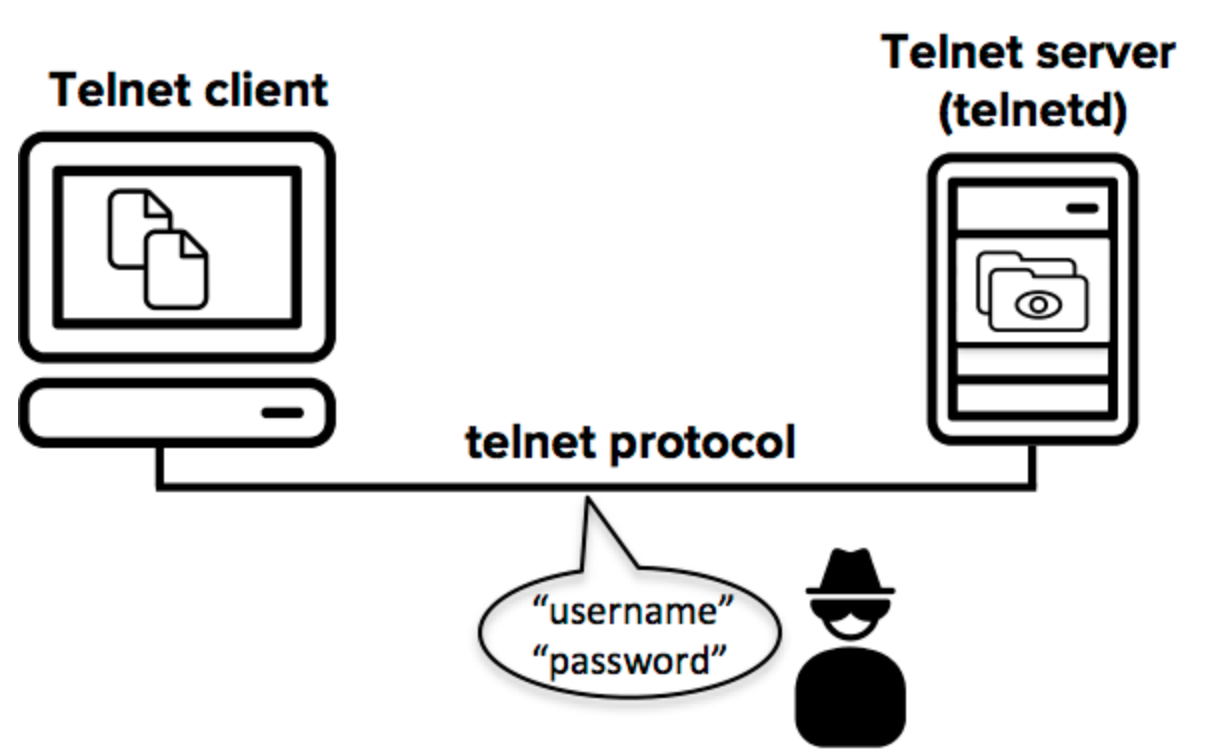
Mickey – Okay, back in the 1960s when there was a need to make computers talk to each other over a network, a set of rules was created for any two computers to communicate with each other, This set of rules or protocol was called TELNET
Minnie – Yes, I have heard that word
Mickey – So TELNET allowed user on one computer to take control or access another computer over a network (i.e. 2 computers that are not physically connected with wires)
Minnie – That’s interesting
Mickey – This was a great achievement, but the problem was this was not secure especially over the internet. The information sent from one machine to another was sent as it is, in its original form. So there was a threat that anyone can get read or intercept the data during the transfer process from one system to another
Mickey – So in the mid 90’s there came a successor of TELNET, a more secure way for communication over the network, called Secure Shell or SSH
Minnie – It’s good to know where it all began
Mickey – Yes, Now with that knowledge, Let’s understand how SSH works
Minnie – Yeah
Mickey – To establish SSH connection we need the following
- Server or Remote machine (running SSH server)
- Client or the Local machine (having SSH client)
- Authentication (using password or ssh keys)
Minnie – Got this
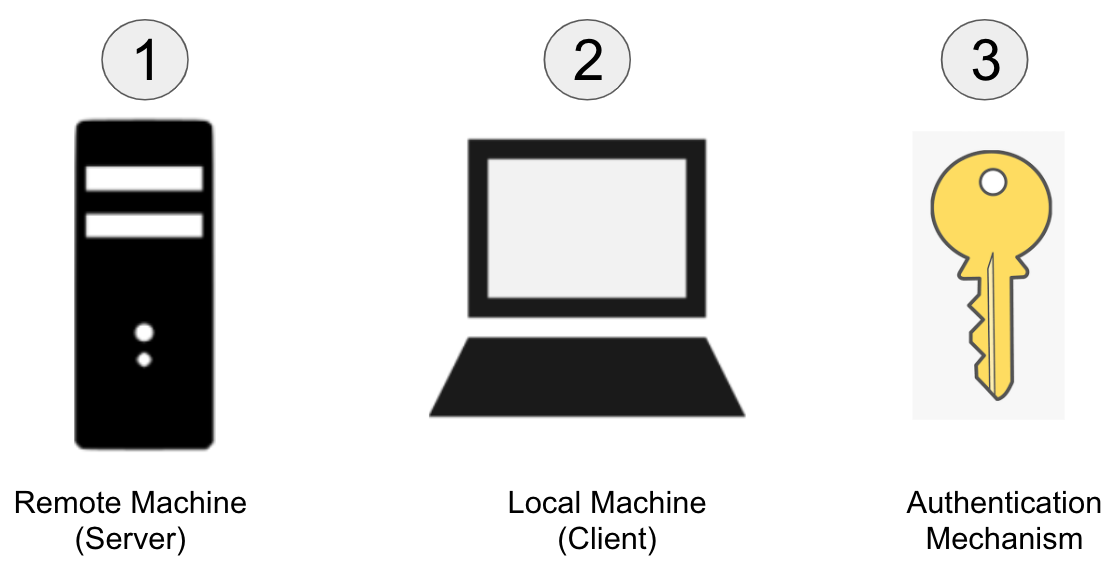
Mickey – So the first thing we will need is a computer running an SSH server. This is the machine that we want to access and control.
Minnie – So is this the server
Mickey – Yes. And to enable SSH, you just can enable remote login if the computer runs on Mac OS, If its Linux, can install Open SSH server. For windows, as well there is an option to install open ssh server
Minnie – I never knew this, wow
Mickey – We can also do the same on mobile like android by installing some SSH app
Minnie – Okay
Mickey – So now we have a system running an SSH server, And that’s the 1st thing we needed. This is the server or remote machine
Minnie – Step 1 done
Mickey – Now we need another system that will be our client

Minnie – So client again can be any machine running Linux, Mac or Windows OS
Mickey – Yes, and if it is Linux or Mac, you do not need to add any tool, You can connect to server directly from the terminal and if its window, you can use any SSH client applications like Putty
Minnie – What about Android and iOS
Mickey – You will find many apps for both of them like JuiceSSH, Termius, etc
Minnie – Okay
Mickey – Now assuming both the client and server computers are on the same network, you can access the server from client using the command
ssh {user}@{host}
{user} represents the account you want to access. For example, you may want to access the root user, which is synonymous with system administrators with complete rights to modify anything on the system.
{host} refers to the computer you want to access. This can be an IP Address (e.g. 123.234.24.10) or a domain name (e.g. www.example.com)
So a real command will look like
ssh root@65.123.13.10
Minnie – So here I need to know the IP or domain name of the server that I need to connect and the username or id of the user who is connecting to the server
Mickey – Exactly
Now hereafter typing the above command when you hit enter, you will be prompted to enter the password for the requested account. When you type it in, nothing will appear on the screen, but your password is, in fact being transmitted. Once you’re done typing, hit enter once again. If your password is correct, you will be greeted with a remote terminal window.
Minnie – So I need to know the user’s password
Mickey – Yes, of course, this is the authentication to access the server
Minnie – Okay
Mickey – So now you are into the server. Congrats
Minnie – I am Happy
Mickey – And now you can run your commands and can have data exchange in a secure way
Minnie – Okay, what about the keys, I get to hear a lot about public and private keys in SSH communication, What is all about that
Mickey – There are 2 ways of authentication
- Password-based authentication
- Key-based authentication
In Key-based authentication, in order to establish a secure connection between 2 systems we make 2 keys, one is called a public key and other is called a private key
Minnie – Now you are talking
Mickey – The private key remains on the client system and the public key is uploaded on the server
Minnie – Got this
Mickey – So whenever we connect using ssh, these 2 keys are checked and if the right combination of a private and public key is found, the connection is established
Minnie – Can you tell how exactly these keys are created, Like the commands, etc.
Mickey – That will be too deep
Minnie – Yeah I want to go deep. Very deep
Mickey – So from the client system, I will open the terminal and type
ssh-keygen -t rsa
Minnie – What is -t option here
Mickey – We use the –t option to specify the type of key to create. Possible values are “rsa1” for protocol version 1, and “dsa“, “ecdsa“, or “rsa” for protocol version 2
But don’t get confused with that for now.
Minnie – So if I want I can skip the type and only run ssh-keygen
Mickey – Yes, right Minnie
Minnie – Okay, So this single command generates the public-private authentication key pair
Mickey – Yes, and the key pair is unique for a user, Example if you generate these keys as the root user, only this user can authenticate using this key pair and for a different user another set of keys needs to be generated
Minnie – Okay
Mickey – After you run the command ssh-keygen -t rsa you can provide the location or file name where you want to save the keys, or just hit enter

Minnie – Got this
Mickey – Then you will have the option of specifying a passphrase to encrypt the private part of the key. If you encrypt your personal key, you must supply the passphrase each time you use the key. This prevents an attacker, who has access to your private key and can impersonate you and access all the computers you have access to, from being able to do so. The attacker still needs to supply the passphrase

Minnie – Great, so adding a password gives an extra level of security for the private key
Mickey – Yes
Minnie – Keep going
Mickey – The ssh-key command generates two keys
id_rsa
id_rsa.pub
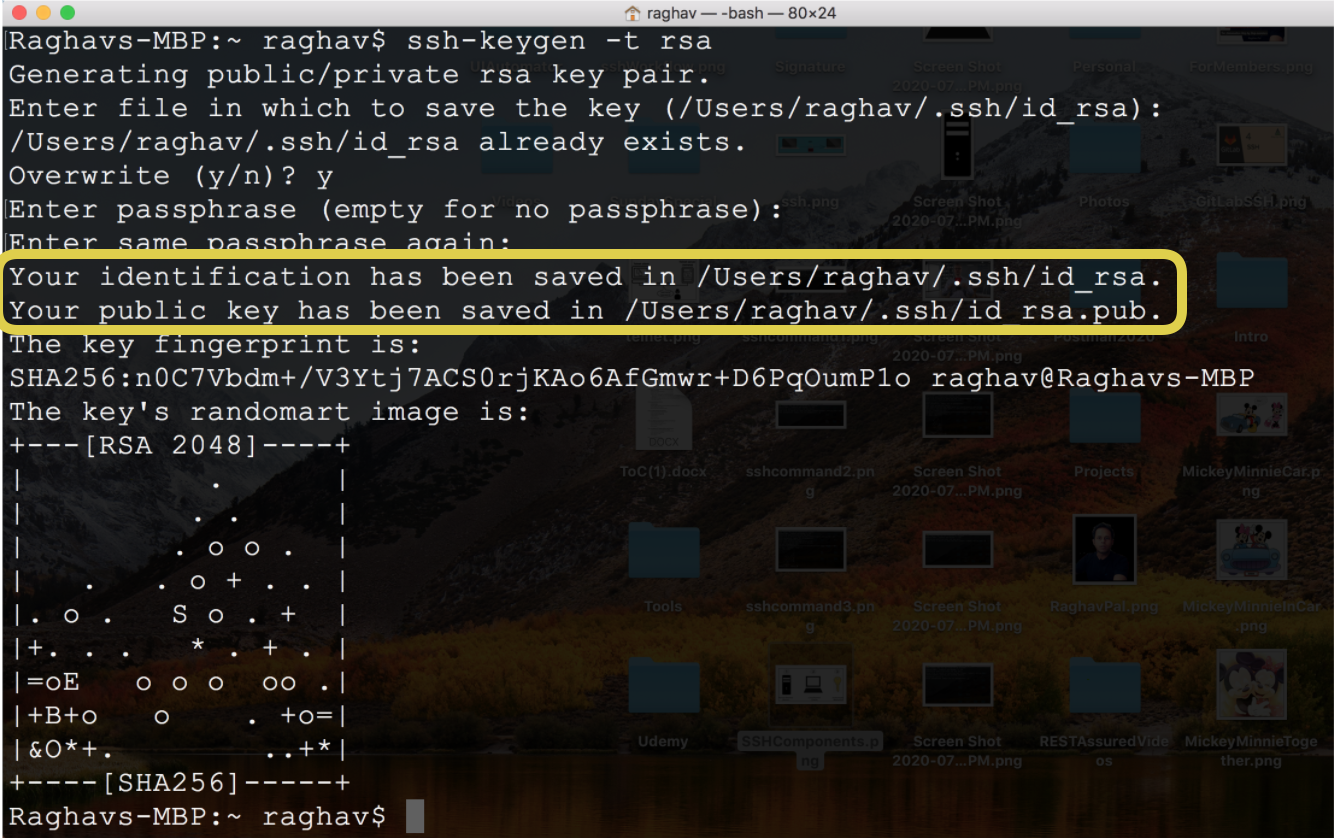
Minnie – So here id_rsa is the private key and id_rsa.pub is the public key.
Mickey – Yes, the private key will remain on the local machine and public key will be sent to the server
(Never share your private key with anyone)
Minnie – How to copy the public key to the server
Mickey – You can do in multiple ways like can use this command
ssh-copy-id user@ip
e.g.
ssh-copy-id root@126.45.65.10
Minnie – Where will this key go on the remote system
Mickey – Good question, so the key gets copied at ~/.ssh/authorized_keys on the remote. So remember if you use any other way to send the public key. Put it under this folder
Minnie – Wow
Mickey – In the case of some remote servers that can be accessed from the browser, you can log in to the web interface of the server on a browser and upload the public key. Like in GitLab or GitHub.
Mickey – Now whenever you need to connect to the remote system or server, from your local system run this command
ssh user@ip
e.g.
ssh root@126.45.65.10
Minnie – Wow, so now we do not need a password
Mickey – Yes, authentication will be done based on private-public key pair
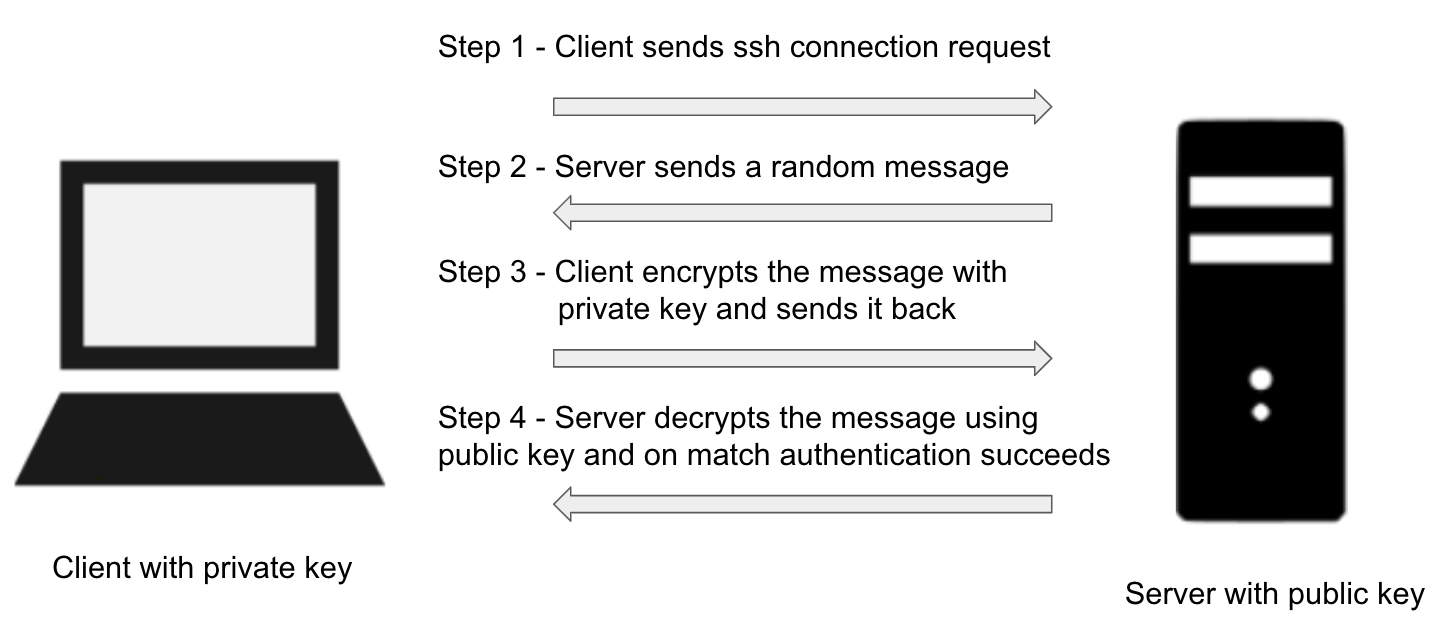
Minnie – So to connect over SSH we have the option for password-based authentication and key-based authentication, both, Am I right Mickey.
Mickey – Yes, and key-based is more secure than password-based authentication
Minnie – Wow this is so great to know
Mickey – So remember
SSH (Secure Shell) is a network protocol, that provides a secure channel over a network for a client and server application to transfer data or information OR a secured way to access any resource over a network
Minnie – Yes I will never forget this
Mickey – Good
Minnie – After knowing all this, just wanted to know who created SSH
Mickey – SSH was invented by Tatu Ylonen. In 1995 he designed the first version. If you like to check this video here
Mickey – Do you want to go on another long driver or shall we go back home
Minnie – I want to have an ice-cream now. Looks like I have learned a lot in a day
Mickey – Sure Minnie here we go
Minnie – You are my best friend
Mickey – I am always here for you 🙂
